Tuesday, July 17, 2012

Gilboa Ladies Flat Cap H40 - The making of ...


Once again a brief overview, showing some of the steps involved in the making of Gilboa Flat Cap H43. Some of the pictures are slightly blurred but it will give the general idea of what is going on.
The inspiration for this hat's design came from an art nouveau door.
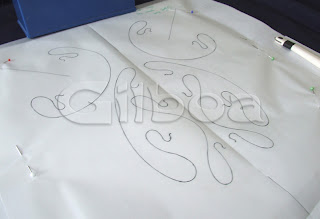
First the imagined design is being sketched with pencil on transparency paper and
once happy, drawn out in ink.
  As the pattern starts to become more and more complicated, colour-coding helps making sense of it all later.


 This is the door that was inspiration for this particular design (and there will be more).
To see if the design is workable at all, a prototype with scrap fabric is created. It is made up of 3 pieces intertwining and added pin-tucks that are 'climb' over and under.


Now lets start with the real deal:

 
 Now the indivividual pieces (3) are being one by one transferred onto the main fabric's left hand side.


Piece number one


 The traces are 'transferred' to the right side of the fabric by 'basting' stitches, marking the actual shape and the pin-tuck decoration in different colours.


That is how it looks on the fabric's right side, the stitches can later be removed without leaving any marks.

 
 Piece number 2: same as above - transfer, trace, baste.


Piece number 2: the right side.


  Piece number 2 is being prepared to be stitched onto piece number one.


 The two pieces joined.


Piece number 3: again, tracing and basting.


The basting here is used for placement of the previously joined up pieces as well as marking the pin-tuck position.


 All 3 pieces joined.


Seams are being cleaned up before pin-tucking.


 The most time-consuming part: the pin-tucks. One by one they are stitched, rather a stop-start affair and testing one's patience. But the effect is worth it in the end!


Saturday, July 7, 2012

Gilboa Flat Cap H38 - The making of

A brief summary of the steps involved during the making of flat cap H38, shown in the snapshots below.


The pin-tuck pattern is sketched in pencil on transparency paper.


Once satisfied with the sketch, it is then finalised in ink and mirrored. 
Now the pattern is ready to be transferred onto left side of the fabric. 


 The transferred pattern is now visible on the left side of the fabric. However, to be able to pin-tuck the pattern, it has to be visible on the right side; the entire pattern now needs to be 'basted' by hand.


 Now the pattern is visible on the right side of the fabric. 
The marking thread can later be removed without leaving any marks.


 Pin tuck pattern partly stitched.


 The threads need to be cleaned up on the reverse side so they do not come loose later.


 The pin-tuck pattern finished and ready to be cut.


 The cap is taking on shape.


The lining, made out of vintage kimono silk.


Gilboa flat cap H38 - completed.


Monday, July 2, 2012

The making of Gilboa Flat Cap H37

Showing some of the steps involved when creating pin-tucks:

Handsketched design is finalised in ink on transparency paper. 
From there it is copied onto the left side of the fabric with tailor copy paper.

The design now has to be made visible on the right side of the fabric without leaving any marks later.


Different coloured threads help prefents confusion when sewing the actual pin-tucks.

Part one of the cap is ready to be cut into shape

The pin-tuck design on the main hat piece is taking shape.

The main piece finished, ready to be cut into shape.


The finished hat - Gilboa Flat Cap H37