Thursday, November 7, 2013

The Making of Rusty Red Velvet Gilboa Beret

The Gilboa Beret, while not really a beret is nevertheless oozing elegance and style, elevating the wearer to feeling very special. 

whereas a traditional beret is made of one singular piece and the usual material would be felt or wool, the Gilboa Beret is made up of 10 individually and differently shaped pieces, giving the beret a voluminous and so some individuals have commented: a regal feel.


 The completed piece - Gilboa Beret made with a rusty red cotton velvet. Detailing with pheasant and turkey feathers and antique buttons. Photograph has been taken with natural lighting which shows the beautiful colours of the feathers contrasting with the velvet. A great colour combination for this season.


 I had a vague idea in my head regarding the design of the beret although the fabric thickness and handleability have to be taken into consideration and often require slight changes. I had already made up my mind what fabric I would want to work with:


 A very lush rusty red velvet.


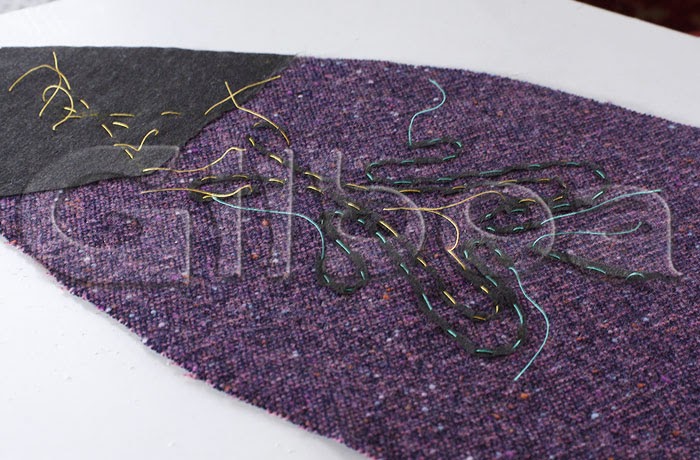
The previously sketched pin-tuck design is being transferred onto the reverse side of the velvet.

Barely visible, the transferred design in yellow dots on the reverse side of the velvet.

The pin-tucks are stitched on the right side of the fabric therefore I do now have to trace the dotted lines with baste stitching so that the design becomes visible on the right side of the velvet.

This has to be done x10 ...  I also need to take into consideration that the pin-tucks will shrink and distort the fabric slightly so I have to carefully consider were to place the markers so that I can later cut the actual pieces before joining it all together. As you can see, all 10 pieces are cut extra large to compensate for the distortion caused by the pin-tucks.

The above image shows two stages: the pin-tucks are being stitched by following the basted stitching.

Again x10 ... Each swirly line needs to be cleaned up on the reverse so that the threads do not come loose later. It is a very time consuming effort and it is at this stage where sometimes I can change my mind and start all over again if the created effect is not to my liking.

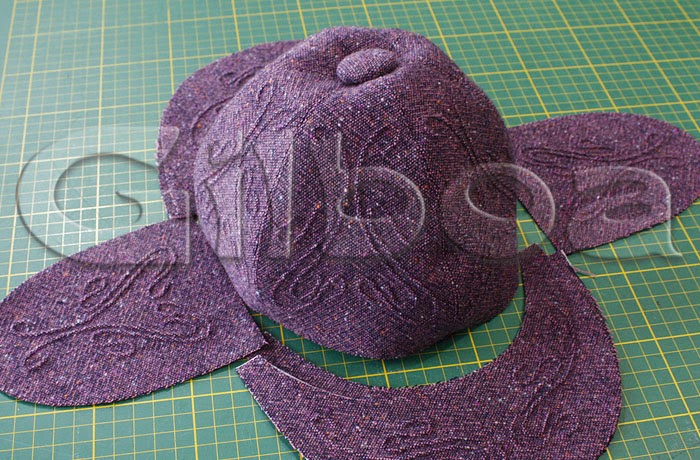
The individual pieces have been cut into their individual shapes and the beret is slowly taking on shape.
It is during this stage when I decide whether I am indeed satisfied with the design ...

... the beret is slowly coming together. Before joining the two halves I insert a middle lining (again made with 10 individually shaped pieces) which will allow the wearer of the beret to be shape the hat to requirements.

Before adding the lining I select the feathers and buttons for detailing at the back and front.

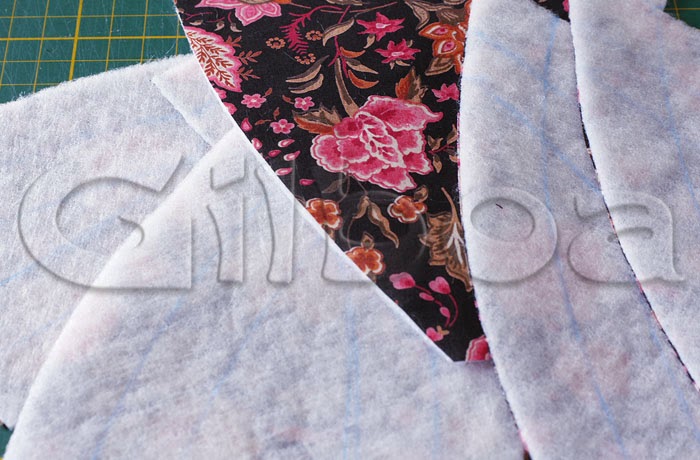
The inner lining: a luxurious silk fabric which will keep your head comfortably warm. It is also made of 10 individually shaped pieces, just like the outer part of the beret.


And lastly: all pieces are ready to be joined together:
- the main part (velvet) is ready and fitted with 'shaping' lining
- the inner lining is also ready
- the decoration for the front and back have been hand sewn and are ready to be attached


Very often by the time I have completed a piece as detailed as this I have had enough of looking at it and am incabable of objectively judge its 'beauty'.  I have to store it out of sight immediately but just before I leave the studio in the evening, I display it on the bust on the centre of my cutting table so that when I enter the next morning it will be the first thing I see; that is generally the moment when I make up my mind for the last time and decide whether it was worth all the effort.


 In this case I very much like the end result and would have liked to keep it for myself ... but I deliberately made it too big for me so that I am not tempted.

I hope it will find a proud wearer!


Saturday, October 26, 2013

The Making of Purple Tweed and Velvet Deerstalker Hat - H69


 Finished Puprle Tweed and Velvet Deerstalker Hat - H69


 The main fabric: a beautiful, rich purple tweed with flecks of orange and sky-blue.
Quite loosely woven.

Before transferring the pin-tuck design onto the reverse side of the main fabric, I need to use an easily removable interfacing so that I can see the design. This interfacing will also assist in keeping the fairly loosely woven tweed in shape while tracing the design with pin-tucks.


 Transferring the pin-tuck design which I had sketched. This here is the design for the visors.

 The transferred design now appears in yellow dotted lines.

This has to be done x 10 (+2 for the flaps which are not shown in this image.

 Now each of these designs has to be hand basted so it is visible on the right side of the fabric where the pin-tucks will appear.

 Again:  x 10 (+2)


The black interfacing now has to be removed, otherwise the fabric would be too thick to raise with pin-tucks. Leaving only a little left on each side of the basted stitches for stability. Again, this has to be done for each piece.


Finally I am ready tracing to trace the design with pin-tucks ...

The fabric raises nicely; here one finished design. 
Pin-tucking will 'shrink' the fabric which is why the individual pieces have to be cut over-sized to allow for the loss of width and length.


All 10 pieces of main fabric with their completed designs, ready to be cut into their actual shapes.


One by one, the pieces are joined together.

 The hat is solwly taking on shape.

I finally decided what material to use for the inner flaps. Using tweed would not feel comfortable on the skin when the flaps are folded down. I chose a very lush, navy velvet.

 Here too, tracing the design with pin-tucks. The effect is great on velvet!

 The visors ... there are of course two.

Last check to see whether I am still happy with the material choice ...

The flaps are finished and ready to be joined with the main part.

 Still, one more final check ....


Not to forget the lining, a beautiful, floral cotton (tana lawn).

 Each piece needs to be padded ... in blue the lines I had just drawn for stitching ...

The padding has been added ...

 The lining is ready to be inserted ...


 The lining is pinned into place. I then hand-stitch along the edges of the hat band so it is neat and tidy.


And finally, I baste it all into place for the final stitching wich will be seen on both side.
There are some further steps to follow but they are not documented here due to lack of time.


It was yet again most satisfactory to work on this piece and see the end result!


Friday, October 18, 2013

The Making of Green Tweed Deerstalker (H68)


Dear reader: please do forgive for the shortness of the descriptions but writing is not one of my skills. I prefer to spend my time making rather than writing, I hope you understand.


 The finished Deerstalker H68- Displayed with studio light and in natural light.


You notice that the pin-tuck design does really stand out in natural light as the shadows work well.


 I have always been a great fan of art nouveau design and that time period is what very often inspires me for a design if I work with plain fabric.

Firstly I do sketch the design with pencil and once satisfied with its shape I then finalise it in ink.


 The finalised designs for the different parts of the Deerstalker hat.


The chosen fabric is a beautiful, medium weight, olive/moss green vintage Scotspun Tweed with flecks of red and orange.

 The designs are now being transfered onto the reverse of the fabirc.

 The transfereed design showing in yellow dots

 To make the design visible on the right side, each line has to be basted by hand.

 Now the design is visible on the right side. Separate lines are in separate colours so I don't mix the lines when pin-tucking.

 One by one, the design is being traced with pin-tucks.

 One finished design.

 But there is more ... here the design for one of the visors is being transfered.

 All 10 pieces with the designs are ready for pin-tucking.

Some time later ... the individual pieces are ready to be cut into their shapes.

 The hat is slowly taking on shape.

I like this part, when it all comes together.

 Preparing the flaps ...

 ... preparing the 2 visors ....

 All going well so far ...

The flaps have been joined ... 

Almost there ...

 The lining, in this case a luxurious vintage silk is being prepared with padding.

 The lining taking on shape ...

Inserting the lining and basting it into place before sewing. 


This was a lengthy process but I am very pleased with the end result. In fact so much that I find it difficult to let it go!

It works very well with red hair, I might add!